Upgrading from TFS 2013 to TFS 2017

I was running TFS 2013 Update 4 on top of SQL Server 2012 SP3 and was unable to upgrade to TFS 2017 because this version of the SQL database is not supported.  So, I ran the SQL Server 2016 installer from the ISO and used the SQL Upgrade tool.

I then uninstalled SQL Server 2012 by double-clicking on the “Microsoft SQL Server 2012 (64-bit)” entry in Control Panel’s Programs and Features and selecting “Remove”.  I clicked the “Select All” button, clicked the Next button, clicked the Next button, and lastly clicked the “Remove” button.  This started the uninstall of SQL Server 2012.

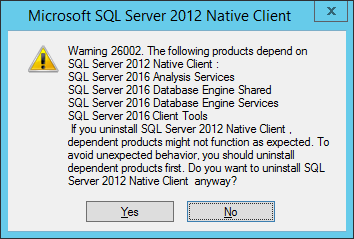
Note that I did not uninstall Microsoft SQL Server 2012 Native Client.  When I attempted to do so, I got the following dialog box:
Then I installed TFS 2017 from the ISO and ran the Team Foundation Server Configuration Wizard.

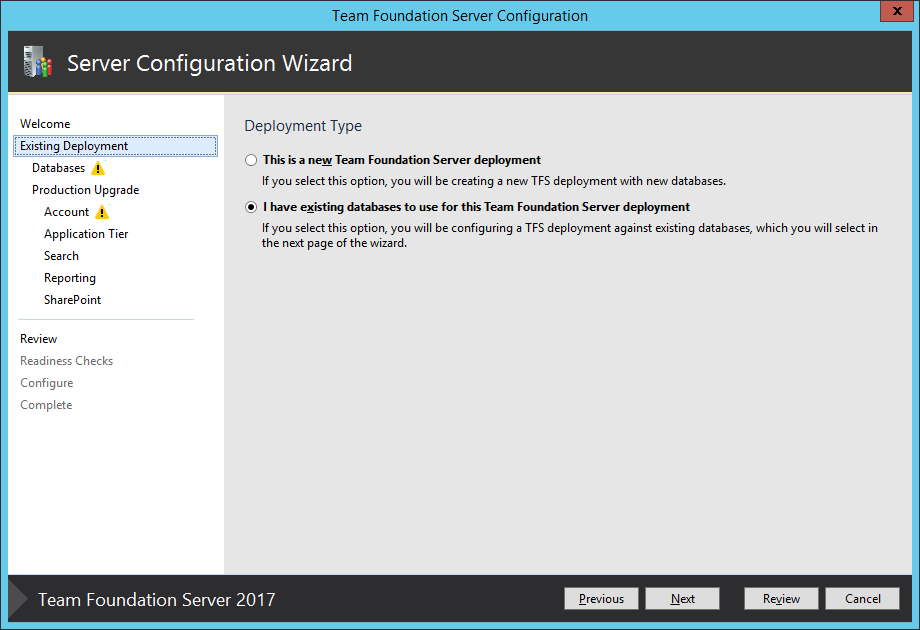
I selected “I have existing databases to use for this Team Foundation Server deployment” and clicked Next.
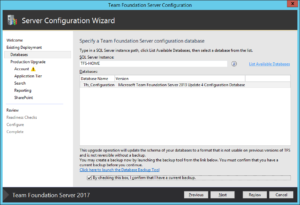
Then I selected my (only) SQL Server Instance, selected my (only) database, and checked the box stating that I have a current backup.  Make sure you do before proceeding!  I then clicked Next.

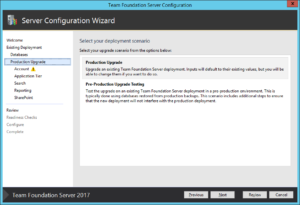
Then I selected “Production Upgrade” and clicked Next.

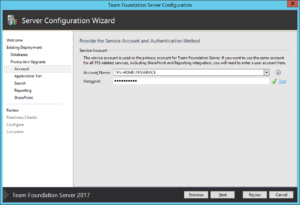
Then I entered the service account name under which the TFS Windows Service will run.  Click the Test link to make sure you have the password correct before proceeding.  Click Next.

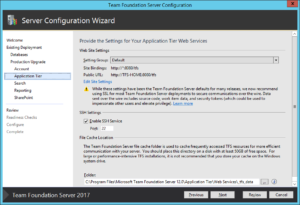
You may now wish to update your website settings to use SSL/TLS so that web-based connections to TFS are secure.  I did not, so I accepted the existing values.  You can also check the box to enable SSH (Secure Shell) connections to TFS; it was checked by default for me.  You may also update the location of the File Cache used by TFS.  Click Next.

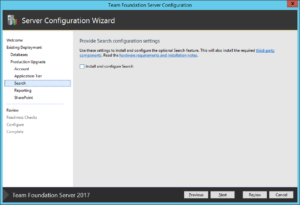
The next step allows you to enable Search across your repositories.  It defaults to unchecked; I chose not to install it at this time.  You can always install it later.  Click Next.

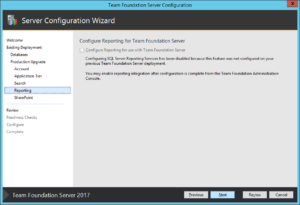
You may now configure reporting for TFS.  I didn’t have it installed before, so configuring it now was not an option.  Click Next.

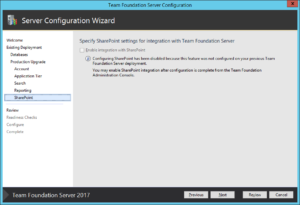
You may now configure SharePoint for TFS.  I didn’t have it installed before, so configuring it now was not an option.  Click Next.

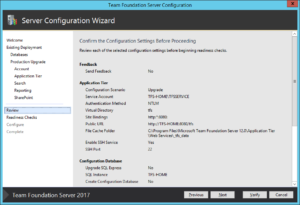
You are now presented with the Settings Confirmation page.  You may click the Verify button or just click Next.  I clicked Next.  It will automatically run through the verification process.

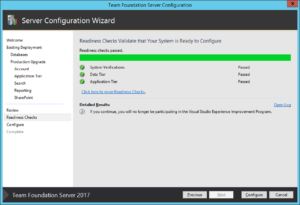
If everything verifies as successful, you will see a screen similar to the following.  If all was successful, click Configure to Upgrade your previous installation of databases and TFS to 2017.

Rob

This post was migrated from https://blogs.msdn.microsoft.com/rob/2016/12/22/upgrading-from-tfs-2013-to-tfs-2017/.

Sending eBooks to the iPad Wirelessly

My coworker, Mark, asked me how I get eBooks onto my iPad today. I told him I had never read an eBook on my iPad and he said I needed to correct this.

Since I store all of my eBooks in my OneDrive account and then manage them with calibre, I will sometimes just open PDFs from the caliber folder using the OneDrive iPad app and read them in Acrobat Reader on the iPad, but it seemed like there should be a better way to read eBooks. I also wanted a good way to read epub files on the iPad.

It turns out that the calibre team already figured out how to do this, so I am leaving the steps I tried here so I will remember them in the future:

  1. Launch calibre on your PC/Mac.
  2. Turn on the Content Server by clicking the Connect/Share button and leave calibre running.
  3. Start the Safari browser on the iPad and type in the IP address and port of the computer running the calibre server, like this:
    1. http://192.168.1.2:8080/
  4. You will see a list of books in Safari, just click on the epub link for whichever book you want to read, Safari will then prompt you to open it with iBooks.
    1. I had to click the Get button on the calibre web page for the specific book I wanted to transfer to open the book in iBooks.

That’s it! Happy reading.

Convert MKV videos to MP4

It seems like a lot of people do this with Handbrake.  However, from my recent reading, it seems like the better option is to use VidCoder.  I may update this post soon with further details as I try the software out.

Rob

Launch Mac apps with command-line parameters from Windows running under Parallels

I love running Windows using Parallels Desktop on my MacBook Pro (yes, those of you who know me well are aware that it wasn’t that long ago that I was amongst the Mac clueless).  Parallels makes it easy to associate your files with Mac applications running on your host.  If you want to launch a Mac app from the command line, either PowerShell or cmd.exe, you just need to look in the following directory for the app to launch:

"C:\Users\rob\AppData\Roaming\Parallels\Shared Applications"

Note that you will need to replace my username (i.e. rob) in the path above with whatever account you are logged into in your Windows VM.

So, if I want to run the Sublime Text editor installed on my Mac host, I can just run the following from PowerShell:

However, when I tried to pass a command-line parameter to this app, I couldn’t get it to work.  I was trying to pass the file that I wanted to open in Sublime Text from the command line, but Sublime always opened to a blank document.

Thanks to the fine folks at Parallels Support on Twitter, I got the solution: You must pass the full path to the file, not the relative path. It worked!

Now I had one more problem.  From PowerShell, I typically pass the relative path of a file (if I pass any path at all) to apps at the command line.  So, I needed to find a way to pass either the relative path to the file or the full path, if I already have it available.  So, I wrote a PowerShell function:

So, now I can run either of the following PowerShell commands to open a file in Sublime Text:

or

This means that I don’t have to install apps that I already own on my Mac in my Windows VM, as well.  This will save me from having to configure each of these apps twice.  This makes setting up new VMs really easy as well since they will just leverage my Mac’s configured apps.  Woohoo!

Rob

Map the Caps Lock key on your Surface Pro 3 to be the Insert Key

I have really missed the Insert key on my Surface Pro 3 (SP3).  In the process of searching for a key combination that replaced it, I learned that there wasn’t one.  Scott Hanselman posted how to remap the Insert key using SharpKeys.  This utility makes it really simple to make the change.

However, I was also curious about how to remap it by adding a value to the Windows Registry.  After reading about this on the Softpanorama web site, I found that I simply had to do the following:

    1. Go to Start->Run (or press Win+R) and type in ‘regedit’ to open the registry editor.
    2. Navigate to:

      HKEY_LOCAL_MACHINE\SYSTEM\CurrentControlSet\Control\Keyboard Layout
      Note: Keyboard Layout, not Keyboard Layouts!

    3. Go to Edit->New->Binary Value and name it ‘Scancode Map’
    4. Now double-click and edit the value to the following:

      00 00 00 00 00 00 00 00 02 00 00 00 52 E0 3a 00 00 00 00 00

      Note that the 52 E0 represents the scan code for the Caps Lock key.

    5. Now log off and back in.  Pressing the Caps Lock key will now behave like the Insert key.
      1. If logging off and back in doesn’t affect the change, reboot your machine.

Thanks to Softpanorama for such a great post!

Rob

This post was migrated from https://blogs.msdn.microsoft.com/rob/2015/03/04/map-the-caps-lock-key-on-your-surface-pro-3-to-be-the-insert-key/.

Load more